Showing posts with label science. Show all posts

Monday, November 16, 2015

Separating Mixtures

In follow up to our lessons on elements, compounds, and mixtures, we talk about how we can separate mixtures.  Our curriculum requires us to teach 4 different separation techniques: filtration, evaporation, magnetism, and screening.

The first day I introduce this, I give small demonstrations of each one. 
  • I make a mixture of salt water and have that boiling throughout the lesson until it's all gone and only the salt is left.  
  • I have a screen and put a mixture of rocks and dirt through it.  
  • I have a filter and put some stuff through it. 
  • And then this year another teacher let me borrow her mixture of iron filings and sand with her magnet, so we got to show the kids that one as well.  (I also took the kids outside and showed them that the magnet will pick up the iron in the dirt.  One kid came back the next day and said he tried that in his backyard and it worked. Happiness.)
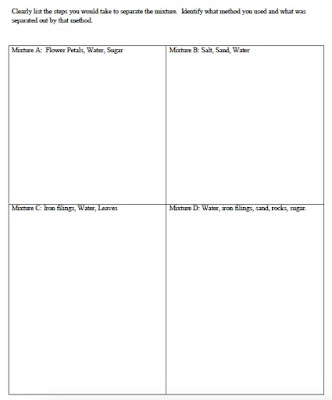
We don't spend much time on this, so there's just a few activities plus a couple of worksheets.  Here's the worksheet I created for this:

Click below for worksheet


Monday, November 9, 2015

Photosynthesis and Respiration

This is a great unit with my seventh graders.  It's easy to start because the kids usually remember something about photosynthesis from elementary school.  If not, they already know that plants need sunlight and water.  This is not a very long unit.  Maybe 2-3 weeks.

The goals for this unit are:
  • The students will be able to write the word equations for photosynthesis and respiration
    • Photosynthesis is
      "sunlight + water + carbon dioxide --> glucose + oxygen."  
    • Respiration is
      "glucose + oxygen --> ATP energy + water + carbon dioxide."
  • The students will identify that photosynthesis occurs in the chloroplast and respiration occurs in the mitochondria
  • The students will identify that they are reverse/opposite reactions.
  • The students will understand the words "reactant" and "product."
  • The students will use their knowledge of the reactions to answer various questions.
Some (not all) of the activities we do for this unit:

1. Acting it out!

I have little cut outs from card stock paper (nothing fancy!) and one kid is assigned a role (either a reactant or a product, or the plant).  I make up a little narrative and the kids have to listen for their part and come in and "act" it out appropriately.  It's just a fun little activity, but it gets the kids up and moving and helps them visualize what's going on.

This class actually happened on Halloween this year, which was perfect.  None of my kids dressed up for school (sad!) so I told them I had brought their costumes: sunlight, water, carbon dioxide, glucose, oxygen, and a plant. haha.

2. Worksheet practice:

Worksheet practice throughout the unit, used in whatever order makes sense for that year and how that group of students is progressing.   This is only two of my worksheets.  The others ended up as a mix of things from other sources that are not directly mine, so I'm not putting them on here.  I know I've got others, but they're probably on my work computer (I'm on my home computer right now).  If I find them I'll put them on here, too. 

(Get the worksheet at the bottom of this page)

Worksheet A: Identification
WORKSHEET B: Chemical Formulas
I use this more for my 8th graders who are working on the periodic table and interpreting chemical formulas.  It reinforces what they learned last year and applies their new knowledge to familiar situations. Link for worksheet at the bottom of this page.


3.  WALL-E Day!
from google image search
No, we don't watch the whole movie, although that would be awesome and less planning for me!  But there's no time to do that and it would be a waste when a few clips can aid your discussion quite nicely.  The kids love this class because we get to watch some of WALL-E and understand that it actually has real science in it!

The clips I show (I may or may not show all of them)
       1. Opening Scene
       2. WALL-E's day at work
       3. WALL-E finds a plant
       4. WALL-E first date scene (EVE takes the plant)
       5. WALL-E in space
       6. Human dystopia
       7. Directive A113
       8. End Credits (I show this so we can talk about what the people are doing and how the earth changes)

WORKSHEET FOR WALL-E (link at bottom of page)


4. Yeast Lab:

It's hard to tell, but the red balloon is a little bigger.
It would be fun to also do a plant lab, but I haven't figured out how to do one of those in our small little country school with limited resources.  So yeast lab is how we'll have to do it! The kids love watching the balloons fill up. I use this towards the end of the unit to really push their thinking and application of what they have learned.  Deeper level questions like "How can you prove the yeast are doing respiration and not photosynthesis?" (possible answers: we added sugar as a reactant; they're not green, so they don't have chloroplast; etc.) "What is filling up the balloon and how do you know?" (CO2, because it's undergoing respiration).  My kids have a harder time with these questions that make them think.  It takes more prodding as a teacher to get these SPED kids to that level.  We can get there, it just takes longer.


LAB WORKSHEET (link at bottom of page)


And that's photosynthesis and respiration.  We do a lot of group lecture, discussion, and practice.  I draw a lot on the board and I have them practice the equations every day.  Today was our last day on the unit, but we have two days of review before our cell test (the overall unit), so we'll have some talk on it before the test next week.

Wednesday, October 28, 2015

The Cell Project!

This year I had my students complete a cell project.  I had two weeks of introducing the cell (more like 1.5 weeks with PTC one week), completing sections in our notebooks, and letting them know this project was coming up.  They also had Fall Break in there, and so there was plenty of time to do the project.

Sideways, but this shows one student's pages in her ISN of the cells and her labels. 
Upside down, but this foldable opens up to reveal the name on one side and the function on another side.


I didn't have my students complete a project last year at home, mostly because I was afraid no one would actually do one.  But I let the kids know, I told the parents about it at PTC, I sent home notices about it, and reminded the kids every single day that they had this project.  I was pleasantly surprised with how many kids actually completed one and how well they turned out!  Remember, I teach special education.  Remember, I teach in a poorer area where kids don't have resources and most parents work late into the night.  So this was awesome.

There were still some students who turned it in late, and then I still have a couple who haven't completed it all together.  But we've conferenced and they know they can bring it in at any time (for reduced credit, since it's late; still, it's much better than a 0).

And now, without further ado.... the projects!


This is a cake with candy on it.  The kid forgot to label the parts but quickly completed that after he completed his work that day. 
There were two cakes, and they were beautiful.  Unfortunately I didn't get pictures of the other one before it was cut up and shared with the other students (after receiving a grade, of course!).

These aren't all of the projects, just a sampling.  I'm so proud of my kids.  They did a great job.


Monday, September 7, 2015

The Scientific Method Foldable

I saw this cute fold-able online that was very similar to how this one turned out.  I borrowed the examples that the other teacher had done for her class and used the same example for my class.  This has been a great tool and my students have already used it a lot as they go through the method in class and especially in preparation for our quizzes. 

Open your interactive notebooks to page 3.  This is right at the beginning of our first unit.
Open it up and you have the step names.
Open it up one more time and you have the definition of each step.
For the PDF, click below
The PDF includes the template for two foldables. The bottom page is glued completely down onto your notebook.  The others are only glued underneath the gray bar.  Cut along the lines so you can open each step one at a time. 

Here are a few examples of my students' work:

Saturday, August 22, 2015

Interactive Science Notebooks

It didn't take me long last year to recognize the benefit of students having a notebook for their notes and glued in important worksheets.  I often had kids throwing away graded assignments as soon as they got them back and students not remembering information that we had taken note on.

When researching the internet I found the fabulous Interactive Notebooks!  I knew this was going to be an important part of my classroom my second year.


Online you'll find lots of ways that other people set up their notebooks.  I have taken what I've liked and passed by what I didn't like.  One thing I really didn't like was the LEFT PAGE/BRAIN and RIGHT PAGE/BRAIN deal, where you have specific things reserved for each side of the page.  No no no.  I can't think like that.  We'll use that next page for whatever we need, whenever we need, thank you very much!
These are the students' ISN notebooks, grouped by the class they are in.  I have since moved the little black books down.  That large pile is my one seventh grade class with all 15 seventh grade sped students in one block.  Next week the schedule is changing and they'll be in two separate classes, making it more manageable.

I've gained a lot of inspiration from different bloggers, but mostly from the Math = Love blog.  She teaches math but I have taken so many of her ideas on how she organizes and gives praise when kids do well on quizzes.  I first heard about this teacher via a radio broadcast featuring her and her blog when I drove home from work one day.  So glad I tuned the radio to the news that day.  (Seriously, she's amazing.  If you've never seen her blog, CLICK ON THE LINK!!!)

Here are a few features of my Interactive Science Notebooks (ISNs):
  • Title Page.
    Students were required to have their name, title of notebook, and class information, as well as a drawing of what science meant to them. In the pictures below, I've taken the shot just below their names to retain privacy.

    This girl hasn't finished coloring hers in yet. This is something they work on when they finish early with other assignments.


     The green man is a scientist?  Or a bandit? Or a martian? :P
  • Unit Table of Content Pages
    I got this from Math=Love (Click to get the file she posted on her blog.  That's what I used!)  Most people have a huge table of contents for the entire book, but I really liked Ms. Hagan's idea to have mini table of contents at the beginning of each unit.  I think it makes it much more manageable and acts as a preview for the unit.
One student's example (spelling is some thing we'll need to work on!)
  • Progress Monitoring Page
    This one is mine.  In college one of our classes had a quiz we took multiple times throughout the semester.  We tracked our progress on the different sections throughout the semester.  When we reached passing grade for a section twice in a row, then we never had to take that section of the quiz again.  My students have the same requirement––they have to reach 85% on a quiz section twice before they have officially passed that section and don't have to take it again.

    This page allows students to track their progress on these quizzes and on the material taught this unit.  It also is teaching students the skill of the graphing and the relationship between a table and a graph.  My sped kids really need help with this.  I'm hoping that by the end of the year this will be a skill they have mastered, since with every unit they will put their score in the table and graph it.
I'll have to add another picture at the end of the unit so you can see the progress.  Section 1's line will all be done in orange (for every student).  Section 2 will be a different color, and so will section 3.  That way students can keep track of each section on the line graph. 

I only test the sections of the unit that we've covered.  On 8/15 I had only covered the first section.  The students just took their second trial (a week after the first), and they had to take both section 1 and 2, since we covered section 2 that week.  We'll be covering section 3 the next week and then they'll be taking the entire quiz (unless they've passed a section off already).
 I've already found this beneficial as it has encouraged the students to study.  We took their second trial on Friday and I gave them a couple of minutes to study.  I had them really trying their best and even teaming up to test each other.  So this is beneficial because the students know what material they are expected to learn (and will be tested on) and they want to improve.

Things I do to make ISNs easier:
  • Have my own draft copy
    I write in this and scribble in this and have ideas of how I want different pages to look.  It's really great and gives me the space to try something or decide I don't like something before I print out the final activity and give it to students.   I have one for my 7th grade curriculum and one for my 8th grade curriculum, and started drafting in them over the summer.
From this draft I realized the print-outs were too big and there wasn't any room for the conclusion.  This allowed me to do a quick fix to the document before having the kids do it the next day.
  • Have my own teacher-copy for each period.
    Each class has it's own official teacher copy for me (separate from my draft copy).  I use this to model for the kids exactly how I'm pasting foldables in, exactly what page they're on, etc.  I think this is especially helpful for my kids, being sped and needing good visual scaffolding, but is a good principle for any group of kids.  It's also useful for kids who join my class schedule late (because schedules are never official until after the first 2-3 weeks, right? And even then they change, especially since I'm a sped teacher.  Every year some kids  graduate from sped and some kids enter sped.) and I can show them mine for reference to help them get caught up.  

I'll soon be adding another one since my 7th grade class just split.  Can we say scheduling one more time?
This is the official copy of the draft above that I made with my kids.  (My averages weren't accurate––I was teaching and trying to go quick and show them how to make the graph).  Some parts are directly copying me and others are for them to fill in (in this case, the experiment results and the rest of the conclusion).
  • Table Kits
    Each table has an assigned Materials Manager, whose job it is to bring materials to the table, manage materials during class, and gather and return all materials at the end.  Each table has a numbered basket that has numbered scissors, numbered markers, and a numbered glue sponge.  I kind of went over board on the numbering (Yes, I wrote the group number on every marker with permanent marker) because I'm kind of paranoid about losing materials and kids stealing them.  The baskets will also have added whatever other materials may be needed that day.  But enough about that; I know you're all wondering about one material in particular, which brings me to my next item of things that make ISNs easier:
I need a picture of the updated kits with the numbers on them. 
  • Glue Sponges!
    Seriously the best thing ever.  I got this idea this summer while perusing the internet for interactive notebook ideas.  I found a video The Kindergarten Smorgasboard  who uses glue sponges in his classroom and finds they are the best way to have glue in the classroom.  They don't make a mess and they eliminate problems that arise when some students thinks the entire back of the page needs to have glue on it––and not just a thin layer of glue, but the entire glue bottle.  So we're saving glue by doing this, too. 
BEHOLD!

Kept in air-tight containers.  They are sprayed with water at the end of the day to keep them moist. 


This is the video Mr. Greg put up on his Kindergarten Smorgasboard blog that I followed watched before making my own glue sponges:


Let me know if you have any suggestions/comments, or let me know how you've set up your interactive notebooks!

Monday, May 25, 2015

Blast Off!

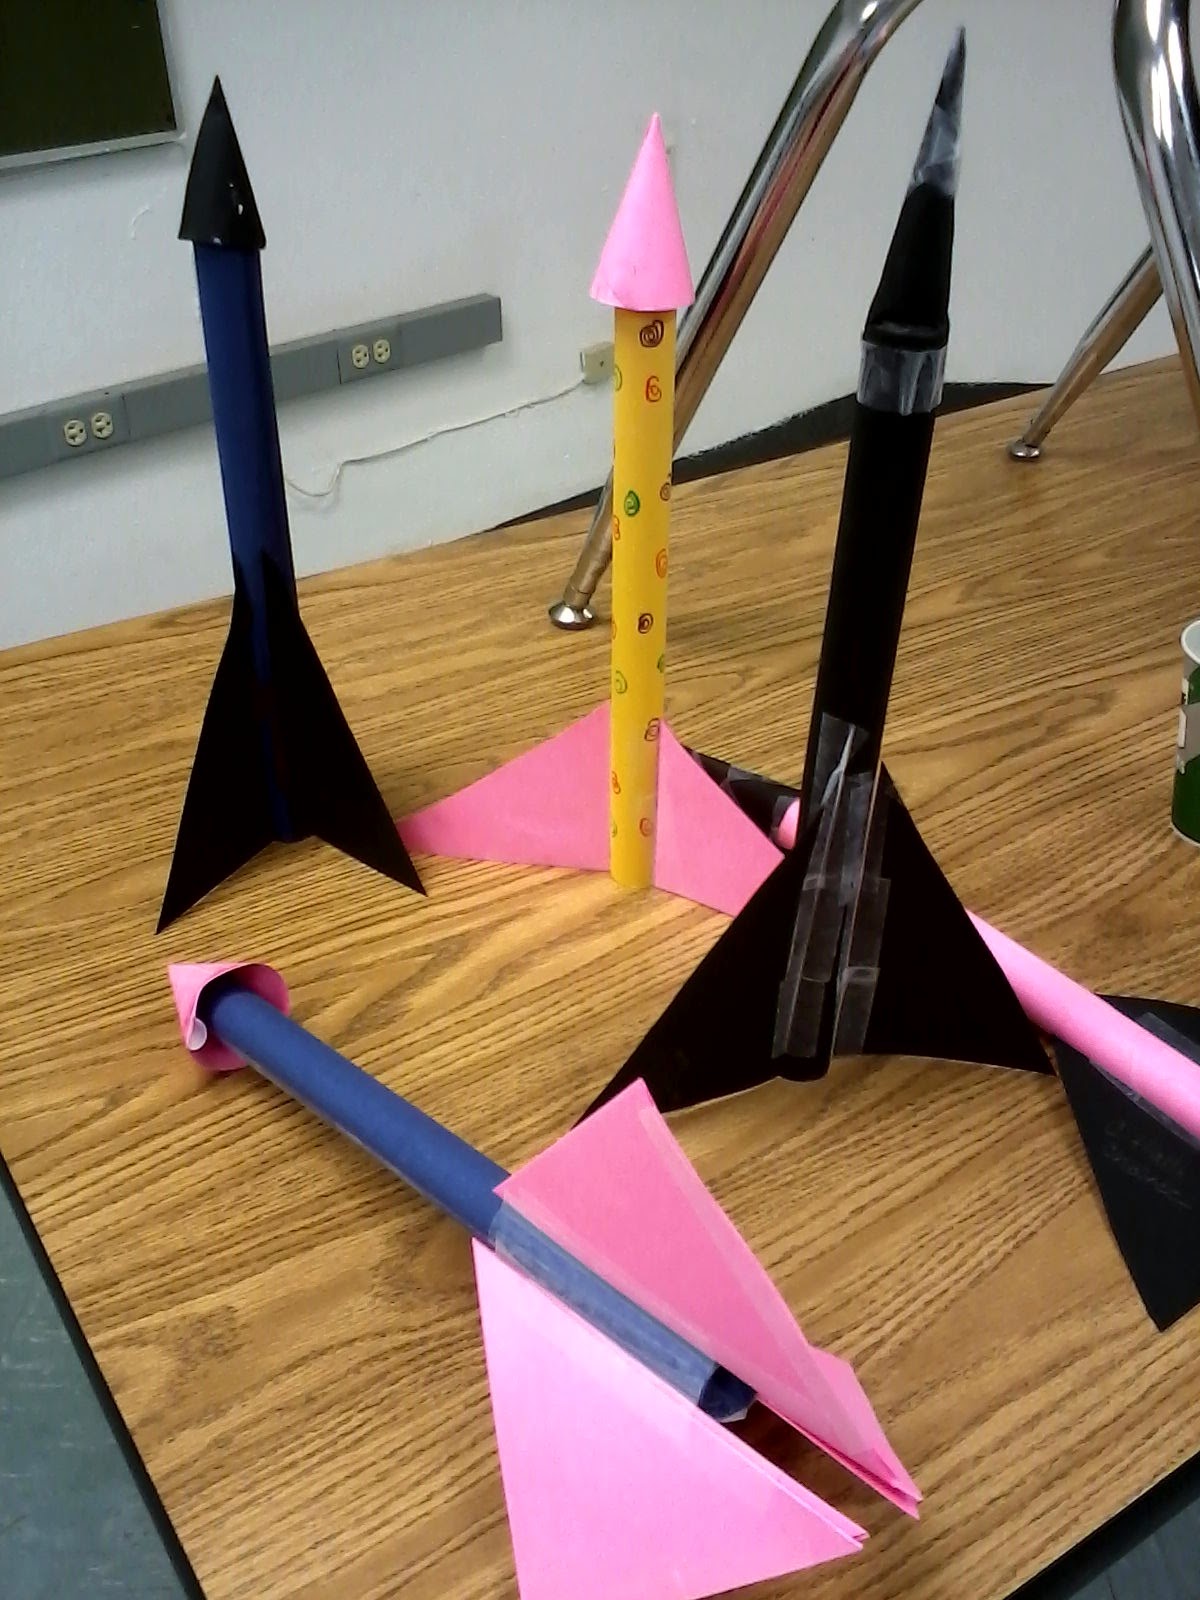
A few of the rockets my students made.
The eighth graders are done with middle school and are moving on.  During the last few days we completed our Forces and Motion unit by building rockets and shooting them off.  Mr. S has done this for years.  He build his own rocket launcher using PVC pipe and an air pump.  The rockets shoot off from all of the air pressure built up.  He has extra PVC pipes to use when building the rocket so the kids can make sure they have the correct diameter needed.

The day we made these was also my birthday.  I received some nice wishes and a note on my whiteboard:

They're simple rockets made from card-stock paper, but it was lots of fun.  A few of the kids made rockets that flew up really high and over the school fence. Most went a little ways up.  Others totally failed and only the top cone blew off and the rest of the rocket remained.  It was a fun last activity, though.

Mr. S ready to blast off another rocket.

Wednesday, May 13, 2015

7th Grade Final Exam

This was an awesome day.  Every single one of my seventh graders passed this test (so far, that is;  I had 3 kids absent today and two suspended––yikes!).  I had four kids get 100% and many get A's and B's.  I didn't have too many C's and I think I had 3 D's?

But this wasn't an easy test.  I was proud of my kids for doing so well and remember so much material over the past year.  These kids are awesome.

I loved walking around as my kids were taking the test.  I would occasionally read the question for them if they asked (this is sped and I am testing them on their science knowledge and not their reading abilities.  I let them read by themselves if they choose to, but I always read test questions when they ask).  During some instances when I read the question, the student would think about it, then have a happy gasp as they said, "oh, I know this one!"  One kid turned to the third page and a big smile came on his face as he quickly started filling in the answers.

I loved it.  Again, this was not an easy test.  These kids worked really hard this year.  They paid attention and completed their assignments.  I'm really proud of them.

Throughout the year my tests have been challenging.  Some of my students have complained that my tests are long.  And I agree with them.  I'm still learning how to ensure I get both breadth and depth in my exams (especially when covering the entire year) and keep it to one page.  Because I have yet to learn this, I brought in little cookies, and I told the kids that when they were done with half of it, I would put a cookie on their desk for "brain energy."  They seemed to enjoy that.

I had a few polite "Thank You"'s when they received their cook, which I quite appreciated, too.  You don't always get that here.

It was so funny to see the worry on their faces when they turned in the exam.  One girl kept exclaiming to herself, "I think I got a bad grade . . . ?"  I graded the tests during the same class period (again, this is sped––I don't have that many kids in there so I can grade these really fast).  When I returned it to her she saw she had received a 100%. She quietly scanned the page reading the little note I had written her, then raised her hands up with a big celebratory shout.  It was adorable.  She kept look through her test over and over again like she couldn't believe it.

If this was an easy test their victory wouldn't have been as sweet.  I don't give easy tests.  They can do much more than that.


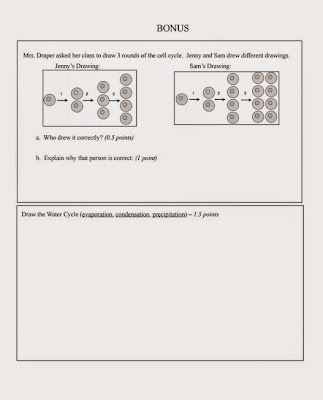
Anyway, this is our seventh grade science final exam.


They all seemed to enjoy the bonus questions.  I had 100% participation on the bonus during this test, which isn't always the case.  I find the bonus questions are motivating because it's a non-threatening way for them to take a chance or a positive way to give extra points for what they've learned.

It was through a bonus question on their first quiz that they learned the term "flagellum."  They all struggled with it (I had only mentioned it a couple of times in class).  Afterwards we worked on it together to discover the answer.  I haven't really mentioned "flagellum" since then, but today after the test when I randomly asked "what's the tail-like structure on the animal cells," my students still remembered. 


Monday, May 11, 2015

8th Grade Final Exam

It's been a while.  But I feel the end of the year is like that.  I'm not really going over anything new, we're just reviewing everything we've already done.  And then there are a lot of activities and meetings towards the end of the year.

Does anyone else feel like the end of the year is both a drag (still 3 more weeks left??) and a sprint to the finish (only 3 more weeks left??)?

Today my eighth graders took their final exam.  My first class left me very pleased with the results.  More than half the class received A's and B's.  That's awesome.  I don't give easy tests and I expect a lot.  So I was very pleased.

My second class was not as good. Only one kid passed, and he passed with a 95%.  How can there be that much difference?  This class is hard to control, they're often yelling at each other, and don't always try their best.  Even during the exam they were asking why they couldn't take notes (um, you don't even have any??) because "all" of the other classes let them use notes.  Well, looking from experience, I've never let you use notes on a test, so why would I let you use notes now?  I want to see how much you have learned, not how well you can take and read your notes.  Needless to say this second period was difficult and hard.  I don't think I'm entirely to blame, but I do have a lot of notes on how I'm going to improve next year.

After all, I'm a brand new teacher.  There is much room for improvement.

Here's my copy of the eighth grade exam.  I was quite pleased with it.  :)


How well would you do on an eighth grade science test?