We just finished our owl pellet dissection. The bones are all out. The next step is for the kids to organize the bones into a skeleton. I felt like they would do much better at that if we first learned what a normal skeleton should look like, and cover a few standards in there at the same time.
I also taught them a few new skeleton terms.
Words most of them already knew: skull, ribs
Words that were new: vertebrae, humerus, radius/ulna, pelvis.
Generic words I used: fingers, leg bones, toes.
To start with:
The Bell Ringer:
Examples of ways the two species were different: Island A may have camouflage. Island B may have long neck.
I kept referring back to this throughout the lesson when kids would give me weird looks. I'll explain as I go.
 Here is a human skeleton. We started by pointing out different parts of the skeleton and having the kids feel for their own bones––feel your ribs, find your sternum, feel your pelvic bones, etc.
I then had a slide with lots of different animals on it: human, raccoon, mouse, bear, bird, whale, snake, fish.
Which of these have a skeleton like the human?
We had a little vote. It was unanimous for the land mammals to have similar skeletons. Maybe whale, maybe bird, definitely not snake or fish.
Then I told them that, except for the fish, every single one of the animals on the board had a pelvic bone. A reminder that the pelvic bone is your hips and your legs are attached to it. The kids all agree that the human, mouse, bear, raccoon, and bird have a pelvic bone, because they all have legs. But they didn't really believe me with the snake or the whale.
Next slide: skeleton images of human, mouse, and snake. Point out the skull. Point out the vertebrae, point out the ribs. All three definitely have this. Then point out the hips. (I had to have two separate images of the snake skeleton so they could actually see the small hip bones.)
Why in the world, would the snake have hips?? I had some good hypotheses with this one, actually. Maybe that's how the snake can lift half of itself up before it strikes?
Actually, dear students, it's because the snake used to have legs. (Now, okay, okay, it wasn't technically a snake when it had legs––it was an entirely different species back then. That's farther into the theory of evolution than we need to worry about now.)
WHAAAT??
This is one of those times when you go back to the Bell Ringer, and you explain that once upon a time, there were lizard-like animals. The population got separated somehow––island, mountain, whatever. And they needed to adapt to their new environment. In that new environment, they didn't need legs. If they didn't need them, would their body put in the energy to make those legs?
One thing you must stress during this lesson is that these changes didn't take place within one animal's lifetime. The changes occur over millions of years!
Anyway, I did the same thing with a new slide of human skeleton, raccoon skeleton, and whale skeleton.
Introduce the infamous picture of comparative anatomy of the arms.
 |
| I didn't actually use this photo, but I used a similar image in our class textbook. Can I also say that I have always loved the bat's arm??? How awesome are those fingers? |
The visual was really good for the kids and solidified their understanding. They loved the bat just as much as I did.
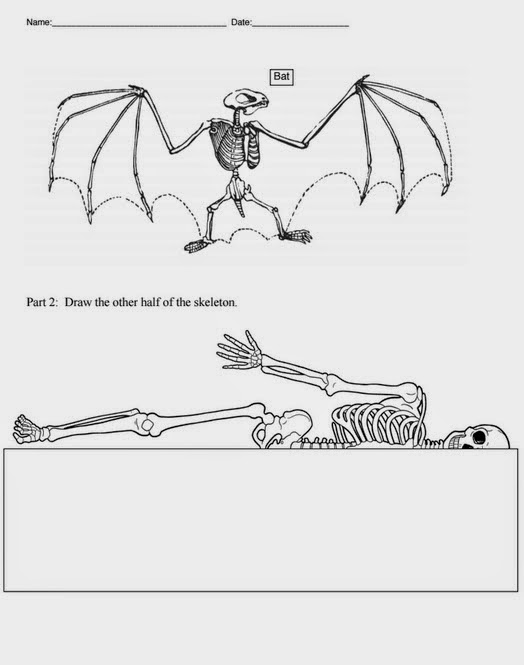
We then went into independent work time. The worksheet was quite simple, but drove home the two objectives I had: (1) learn more about the skeletal anatomy, including new vocabulary words, and (2) understand that comparative anatomy suggests we all descended from a common ancestor.
Oh yeah, and throughout the lesson I talked about how this suggests we all had a common ancestor. A long, long, long, long time ago, there was the great-great-great-great-great-great-great-great-great-great-great-great- etc. etc. - great grandfather, and from him, we got all of the animals on earth.
Again, tie in the bell ringer. The skeleton of the two species are going to be the same. Why would your body put in energy to completely change it when it worked great in the first place? It might look a little different; for example, a longer neck will mean more vertebrae; but in the end, it's essentially the same skeleton.
Bring in the worksheet: (to download, scroll down to the bottom of the page)
As they did this, I had one group at a time come to our bone cleaning station. They were to take their bag of bones from the owl pellet lab and clean them all from any left-over dirt and hair. I'll bleach them for a little while before our next class, and then we'll start gluing them onto poster paper to make a skeleton image of the diseased pray.
Thus, the worksheet was perfect for our purposes. It solidified our objectives and was simple enough for the kids to complete by themselves with minimal questions asked. This allowed me to help monitor the bone cleaning station more closely. Plus, we had music playing in the background, which always makes life more enjoyable. Successful teaching day.


LOVED this lesson. So inviting to discussion and participation --and paying attention!
ReplyDeleteYou could show the kids a picture of legless lizards as an example of parallel evolution.
ReplyDelete